
To shorten golf clubs, you can follow a few simple steps: measure the desired length, cut the clubs with a saw, remove the grip, trim down the shaft, and reattach the grip. By following these steps, you can easily adjust the length of your golf clubs to suit your needs.
Golf clubs are an essential tool for any golfer, as they directly impact a player’s swing and overall performance on the course. However, standard club lengths may not always be suitable for every individual golfer’s comfort and swing style. In such cases, golfers may opt to shorten their clubs to improve control and consistency.
Shortening golf clubs can be done by following a straightforward process, which involves measuring the desired length, cutting the clubs with a saw, removing the grip, trimming down the shaft, and reattaching the grip. We will explore the step-by-step process of how to shorten golf clubs effectively and efficiently.
Reasons To Shorten Golf Clubs
An important aspect of golfing is having the right equipment that suits your swing style and physique. Golf clubs, in particular, play a crucial role in your performance on the course. If you find that your clubs are not adequately meeting your needs, one option you might consider is shortening them. Shortening golf clubs can provide several benefits that can ultimately improve your control, accuracy, and swing speed. In addition, it can help correct for an improper club fit that might be hindering your performance. Let’s take a closer look at each of these reasons to shorten golf clubs.
Improve Control And Accuracy
If you find that your shots are inconsistent and lacking precision, it could be due to the length of your golf clubs. When your clubs are too long, it becomes much more challenging to have full control over your swing and make accurate shots. By shortening your clubs to a proper length, you can improve your ability to control the clubhead, resulting in greater accuracy and more consistent shots. With enhanced control, you’ll be better equipped to dial in your distance, shape your shots, and avoid mis-hits.
Increase Swing Speed
A shorter club length can also contribute to an increase in swing speed. When your clubs are too long, they can become unwieldy, requiring extra effort and causing you to lose tempo and power in your swing. By shortening your clubs, you can generate a faster swing speed and potentially gain more distance off the tee. With increased speed, you’ll be able to hit the ball with more force, leading to longer shots and a potential advantage on the course.
Correct For Improper Club Fit
Proper club fit is crucial for maximizing your golfing potential. If your clubs are too long or too short for your height and arm length, it can negatively impact your swing mechanics and overall performance. Shortening your clubs can help correct for an improper club fit and ensure that your equipment is tailored to your body’s specifications. By achieving the right club length, you can optimize your swing mechanics, strike the ball more squarely, and achieve the desired trajectory and ball flight.
Ultimately, shortening your golf clubs can have a significant impact on your control, accuracy, swing speed, and overall performance on the course. It’s essential to assess your current club length and determine if making adjustments will benefit your game. Consider seeking the expertise of a professional club fitter who can guide you in finding the optimal length for your clubs. By taking this step, you can potentially enhance your enjoyment of the game and see improvements in your overall performance.
Assessing The Need For Shortening
Shortening golf clubs can improve your swing, accuracy, and overall performance on the golf course. However, it’s important to assess whether or not your clubs need to be shortened before making any modifications. In this section, we will cover two key factors to consider when evaluating the need for shortening: your current swing and club length, and understanding the proper club length for your height and posture.
Evaluating Your Current Swing And Club Length
When it comes to assessing the need for shortening your golf clubs, evaluating your current swing and the length of your clubs is crucial. Here are a few important aspects to consider:
- Consistency: Take note of how consistent your swing is throughout the game. Are you consistently hitting the sweet spot of the clubface? If not, it may be an indication that the length of your clubs is causing an imbalance in your swing.
- Control: Assess your control over the clubhead during your swing. If you find it difficult to maintain control or hit the ball consistently, it could be due to the length of your clubs. Shortening them can help you regain control and improve your accuracy.
- Distance: Consider the distance you achieve with each swing. If you consistently fall short of your desired distance, it may be worth examining whether the length of your clubs is inhibiting your power. Shortening them can help you generate more clubhead speed and increase your distance off the tee.
Understanding The Proper Club Length For Your Height And Posture
Every golfer is unique, and having clubs that match your height and posture is essential for optimal performance. Here’s what you need to know:
| Height | Club Length |
|---|---|
| Less than 5’4″ | Add 1 inch to standard length |
| 5’4″ to 5’7″ | Add 0.5 inch to standard length |
| 5’7″ to 6’1″ | Standard length |
| Above 6’1″ | Consider shortening clubs 0.5 inch |
In addition to height, your posture should also be taken into account when determining the ideal club length. A professional club fitting can provide valuable insight into whether your posture warrants any adjustments to the standard club length.
By evaluating your current swing and understanding the proper club length for your height and posture, you can determine whether shortening your golf clubs is necessary. Remember, making any modifications should be done with careful consideration and preferably with the guidance of a professional club fitter.
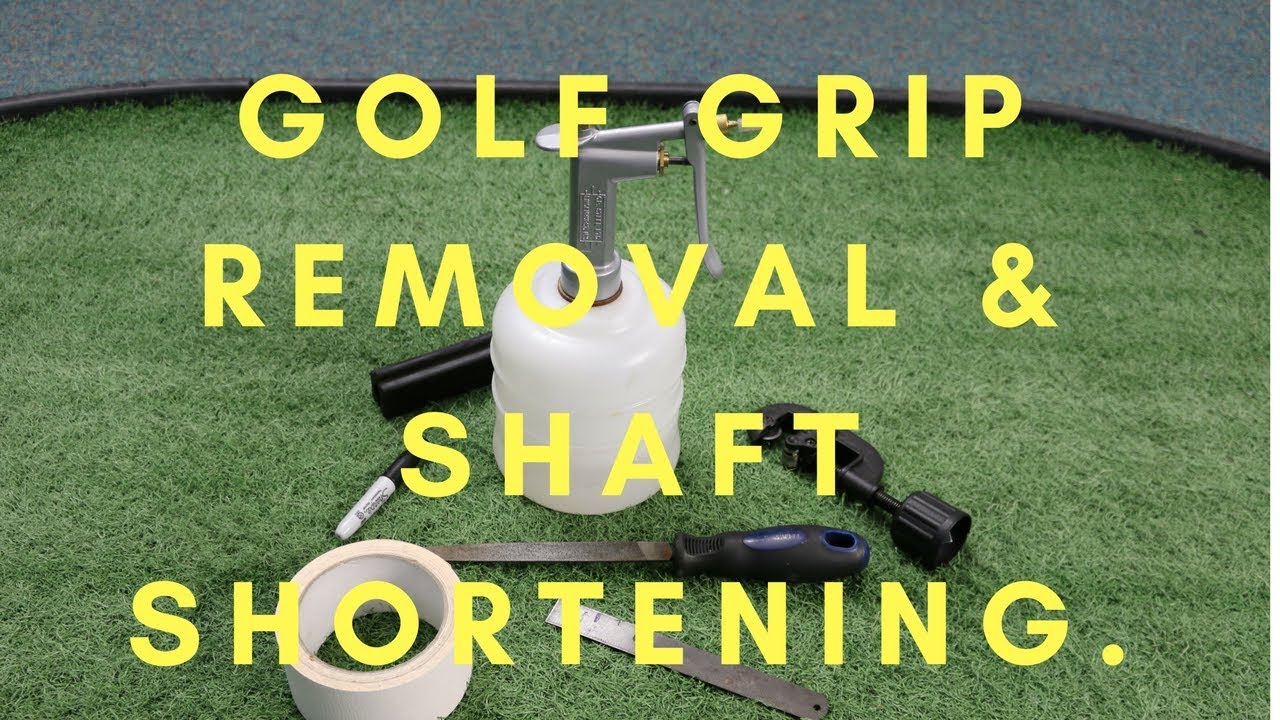
Tools And Materials Needed
In order to effectively shorten your golf clubs, you’ll need a few key tools and materials. These are essential to ensure a precise and accurate job, resulting in clubs that are tailored to your specific needs. Here is a breakdown of the tools and materials required:
Club Vise
To securely hold your golf club in place, a club vise is a must-have tool. This device clamps onto your workbench or table, providing a stable and stationary platform for you to work on. It allows you to maintain a firm grip on the club while you make the necessary adjustments.
Hacksaw
A hacksaw is an indispensable tool for shortening your golf clubs. This tool enables you to cut through the shaft cleanly and precisely. It is important to use a hacksaw with fine teeth to ensure smooth and accurate cuts. Safety goggles and gloves are recommended when using a hacksaw.
Measuring Tape
A measuring tape will help you determine the exact length you want to shorten your clubs to. Accurate measurements are essential for consistency and to achieve the desired results. Make sure your measuring tape is long, flexible, and easy to read for accurate measurements.
Grip Solvent
Grip solvent is necessary when removing the old grip from your golf club. It softens the adhesive and allows for easy removal without damaging the shaft. Additionally, grip solvent can also be used to install the new grip securely.
New Grip
When shortening your golf clubs, it is recommended to replace the grip as well. A new grip ensures optimal performance and comfort. There are various types of grips available on the market, so choose one that suits your preference and playing style.
Sandpaper
Sandpaper is required for smoothing the cut end of the shaft after shortening. This helps prevent any sharp edges or rough surfaces that could potentially cause discomfort or injury. Use a fine-grit sandpaper for a smooth finish that matches the original texture of the shaft.
By having these essential tools and materials at hand, you’ll be well-prepared to confidently tackle the process of shortening your golf clubs to achieve the perfect fit for your game.
Step 1: Measuring The Club Length
Before you can start the process of shortening your golf clubs, you need to accurately measure their current length. This step is crucial to ensure that you achieve the desired results in terms of club length. In this section, we will guide you through the process of measuring the club length using a measuring tape.
Using A Measuring Tape To Determine The Current Length
The first step in the process is to gather a measuring tape, which will help you obtain an accurate measurement of your golf clubs’ current length. Follow these steps to measure your club length:
- Begin by standing in an upright position with the club held firmly in your hand and the clubhead touching the ground.
- Ensure that the club is positioned as it would be during a typical swing.
- Place the measuring tape along the backside of the shaft, starting from the top of the grip and extending to the sole of the clubhead.
- Hold the measuring tape in place and record the length in either inches or centimeters.
By following these steps, you can accurately determine the current length of your golf clubs. This information will be valuable when it comes to deciding how much you want to shorten your clubs.
Identifying The Desired Length Based On Personal Preference Or Professional Advice
Once you have measured the length of your golf clubs, the next step is to identify the desired length based on your personal preference or professional advice. The length of your clubs can greatly impact your swing and overall performance on the course, so it is important to carefully consider your options.
If you are unsure about the ideal length for your clubs, consulting with a professional golf fitter or instructor can provide valuable insights. They can assess your swing mechanics and provide recommendations on the appropriate club length that suits your game.
Alternatively, you can determine the desired length based on your own preferences and past experiences. Consider factors such as comfort, control, and consistency when deciding on the length that suits you best.
By accurately measuring your club length and determining the desired length, you are ready to move on to the next steps of the club shortening process. Stay tuned for our upcoming posts where we will guide you through the remaining steps to safely and effectively shorten your golf clubs.
Step 2: Detaching The Grip
Once you have determined the correct length for your golf club, it’s time to move on to the second step: detaching the grip. This process will require a bit of patience and attention to detail, but by following these simple instructions, you can smoothly remove the grip without causing any damage.
Applying Grip Solvent To Loosen The Adhesive
The first step in detaching the grip is to apply grip solvent. This solvent helps to loosen the adhesive that holds the grip in place, making it easier to remove. To do this:
- Begin by placing the club on a flat surface with the grip pointing up.
- Using a small container, pour a generous amount of grip solvent into it.
- Insert the nozzle of the grip solvent applicator under the grip, ensuring it reaches the adhesive area.
- Squeeze the applicator gently to release the solvent under the grip.
- Rotate the club to distribute the solvent evenly around the adhesive.
Allow the grip solvent to sit for a few minutes. This will give it enough time to loosen the adhesive, making it easier to remove the grip.
Carefully Removing The Grip Without Damaging It
Now that the grip adhesive has been loosened with the solvent, you can proceed with removing the grip. Here’s how:
- Place one hand over the grip to hold it firmly.
- Using a rubber vise clamp or a rubber strap wrench, clamp or wrap it around the grip, close to the clubhead.
- Twist the vise clamp or strap wrench counter-clockwise, using gentle but steady pressure.
- Continue twisting until the grip starts to loosen and slide off the club shaft.
- Once the grip is fully loosened, carefully slide it off the club, making sure to avoid any unnecessary twisting or bending.
By following these steps, you can successfully remove the grip from your golf club without causing harm to the grip itself. Now that the grip has been detached, you can move on to the next step in shortening your golf club to the desired length.
Step 3: Cutting The Shaft
Learn how to shorten your golf clubs with step-by-step instructions. In step 3, you will focus on cutting the shaft to the desired length. This guide provides all the information you need to successfully adjust your golf clubs to fit your game.
Now that you have securely clamped the golf club in a vise to prevent any movement, it’s time to move on to the next step – cutting the shaft to the desired length. This crucial step requires precision and attention to detail to ensure you end up with a properly shortened club that still performs at its best. In this section, we will guide you through the process of cutting the shaft using a hacksaw, so you can confidently modify the club to fit your swing perfectly.Securing The Club In A Vise To Prevent Movement
To start, you need to secure the club in a vise to ensure it stays stable throughout the cutting process. This step is essential to prevent any unnecessary movement or damage to the club. Follow these simple steps to secure the club properly:- Place the clubhead securely into the vise, making sure it is positioned firmly.
- Tighten the vise just enough to hold the club in place without distorting or damaging it.
- Ensure the club is positioned at a comfortable height and angle, allowing easy access to the shaft for the cutting process.
Using A Hacksaw To Cut The Shaft To The Desired Length
Using a hacksaw is a common method for cutting golf club shafts. It allows you to maintain control over the cutting process and achieve accurate results. Follow these steps to use a hacksaw effectively:- Start by marking the desired length on the shaft using a permanent marker. Make sure the mark is clear and visible.
- Position the hacksaw blade carefully against the marked area on the shaft.
- Apply gentle pressure and begin sawing back and forth in a smooth motion. Take your time and let the saw do the work.
- Continue sawing until you have cut through the shaft completely, ensuring a clean and even cut.
- Inspect the cut carefully to ensure it meets your desired length and is free from any jagged edges.
Step 4: Smoothing The Cut Edge
One important step in shortening golf clubs is smoothing the cut edge. By carefully sanding down the edge, you can ensure a clean and precise cut, resulting in a properly shortened club that maintains its performance and aesthetics.
Now that you have successfully shortened your golf club, it’s time to give the cut edge a clean and safe finish. This step is important to ensure that your golf club is not only functional but also comfortable to hold and grip while out on the course. In this section, we will discuss how to use sandpaper to smooth the cut edge of the shaft, resulting in a professional and visually appealing appearance.
Using Sandpaper To Smooth The Cut Edge Of The Shaft
One of the most effective tools for achieving a smooth cut edge is sandpaper. You can choose sandpaper with different grits depending on your preference and the level of smoothness you desire. Start with a coarse grit, such as 80 or 100, to remove any rough edges or burrs left from the cutting process. Then, gradually move to a finer grit, like 220 or 320, for a smoother and more polished surface.
To smooth the cut edge of the shaft, take a sheet of sandpaper and wrap it around the edge. Hold the club securely with one hand while using the other hand to move the sandpaper up and down along the cut edge. Apply even pressure and make sure to cover the entire area to achieve an even result.
Ensuring A Clean And Safe Finish
When sanding the cut edge of the shaft, it is essential to follow some precautions to maintain a clean and safe finish. Here are a few tips to keep in mind:
- Wear safety goggles to protect your eyes from flying debris.
- Secure the golf club firmly to avoid any slips or accidents.
- Use a back-and-forth motion with the sandpaper to prevent uneven sanding.
- Regularly check the progress of the smoothing to ensure you achieve the desired result.
- After sanding, wipe off any dust or debris with a clean cloth or brush.
By following these tips, you can ensure that the cut edge of your shortened golf club is clean, safe, and ready for use.
Step 5: Reattaching The Grip
In the fifth step of shortening your golf clubs, you need to reattach the grip securely. This is an important part of the process to ensure proper club performance and control during your game. Follow these steps carefully for optimal results.
Applying Grip Solvent To The New Shaft End
Before you can reattach the grip, it’s important to prepare the new shaft end by applying grip solvent. This step helps make the re-gripping process easier and ensures a secure fit. Here’s how you can do it:
- Clean the new shaft end to remove any dirt, debris, or old adhesive. Use a cloth or paper towel to wipe it thoroughly.
- Apply a generous amount of grip solvent to the new shaft end. Grip solvent helps lubricate the grip, making it easier to slide it on and ensure proper alignment.
- Spread the grip solvent evenly across the shaft end using your fingers or a brush. Make sure to cover the entire surface.
By applying grip solvent to the new shaft end, you’ll create a smooth surface for the grip to slide onto.
Sliding The Grip Onto The Club And Aligning It Properly
Once you’ve applied the grip solvent, it’s time to slide the grip onto the club and align it properly. Follow these steps to ensure a secure and precise installation:
- Hold the club with the new shaft end facing upwards.
- Position the grip at the top of the shaft and start sliding it down slowly.
- As you slide the grip onto the club, make sure it aligns with the clubface. This ensures proper hand placement and optimal club control during swings.
- Continue sliding the grip until it reaches the desired position on the club.
By sliding the grip onto the club and aligning it properly, you’ll create a comfortable and reliable grip that enhances your performance on the golf course.
Testing And Adjustments
Once you have successfully shortened your golf clubs to your desired length, it is essential to test them out on the course or at the driving range. This step is crucial to ensure that the adjustments you have made have not compromised the comfort and performance of your swing.
Swinging With The Newly Shortened Club To Assess Comfort And Performance
The first and most important part of testing your newly shortened golf club is to swing it and assess its comfort and performance. Take your club to the driving range and hit a few shots with it to get a feel for how it performs. Pay close attention to any changes in the club’s balance, weight distribution, and how it affects your swing.
Here are a few key factors to consider while assessing comfort and performance:
- Check your stance: Ensure that your stance feels natural and comfortable with the shortened club. If you feel any strain or discomfort, it may indicate that further adjustments are required.
- Observe ball flight: Pay attention to the trajectory and distance of your shots. If you notice any significant changes or inconsistencies, it might be a sign that the club length needs further fine-tuning.
- Assess swing mechanics: Evaluate how the shortened club impacts your swing mechanics. Look out for any changes in tempo, timing, or clubhead control. If you experience any difficulties, it may be necessary to make additional adjustments.
Seeking Professional Assistance For Further Adjustments If Needed
If, after testing your newly shortened golf club, you find that it still does not satisfy your requirements, it may be best to seek professional assistance. A professional club fitter or golf instructor can provide valuable insights and make precise adjustments tailored to your swing and playing style.
Consider the following steps when seeking professional assistance:
- Research reputable club fitters: Look for experienced club fitters who specialize in customization and have a good reputation within the golfing community.
- Explain your needs: Communicate your specific requirements to the club fitter and provide them with feedback on how the shortened club feels and performs.
- Follow their recommendations: The club fitter will analyze your swing and recommend further adjustments, such as clubhead weighting, grip sizing, or alterations to the shaft flex. Trust their expertise and follow their recommendations accordingly.
Remember, the goal is to find the optimal balance between comfort and performance when shortening your golf clubs. Through testing, adjustments, and professional guidance, you can ensure that your newly modified clubs meet your unique needs and enhance your overall golfing experience.

Credit: outofboundsgolf.com
Frequently Asked Questions On How To Shorten Golf Clubs
How Do You Shorten A Golf Club At Home?
To shorten a golf club at home, follow these steps: 1. Measure the desired length you want to shorten the club to. 2. Remove the clubhead using a heat gun or a clubhead removal tool. 3. Cut the shaft carefully with a hacksaw to the desired length.
4. Replace the clubhead and secure it using epoxy adhesive. 5. Allow the adhesive to dry before using the club.
How Do I Reduce The Length Of My Golf Club?
To reduce the length of your golf club, follow these steps: 1. Decide on the desired length for your club. 2. Use a hacksaw or pipe cutter to trim the shaft. 3. Remove the grip carefully. 4. Reattach the grip using a solvent or adhesive.
5. Test the club’s performance and adjust as necessary.
What To Do If Golf Clubs Are Too Long?
If your golf clubs are too long, you have a few options. First, you can take them to a professional club fitter who can adjust their length to fit you better. Another option is to buy new clubs that are the appropriate length for your height and swing.
Lastly, you can try gripping down on the club to shorten the effective length.
Which End Do You Shorten On A Golf Shaft?
You should shorten the grip end or the top of a golf shaft.
How Do You Know If Your Golf Clubs Need To Be Shortened?
To determine if your golf clubs need to be shortened, consider your height, swing speed, and comfort level during swing.
Will Shortening Golf Clubs Affect My Swing?
Shortening golf clubs can affect your swing, but it can also improve control and accuracy. It is best to consult with a professional club fitter.
What Is The Correct Length For My Golf Clubs?
The correct length for your golf clubs depends on your height, arm length, and swing style. Consult a professional club fitter for an accurate measurement.
Conclusion
Shortening golf clubs is a common modification for golfers looking to improve their game. By reducing the length of the clubs, players can gain better control, accuracy, and distance on the course. While it is important to consult a professional club fitter for this process, understanding the key factors such as grip size, shaft length, and swing speed can help achieve the desired results.
Remember to consider your individual needs and playstyle when making any adjustments to your golf clubs.